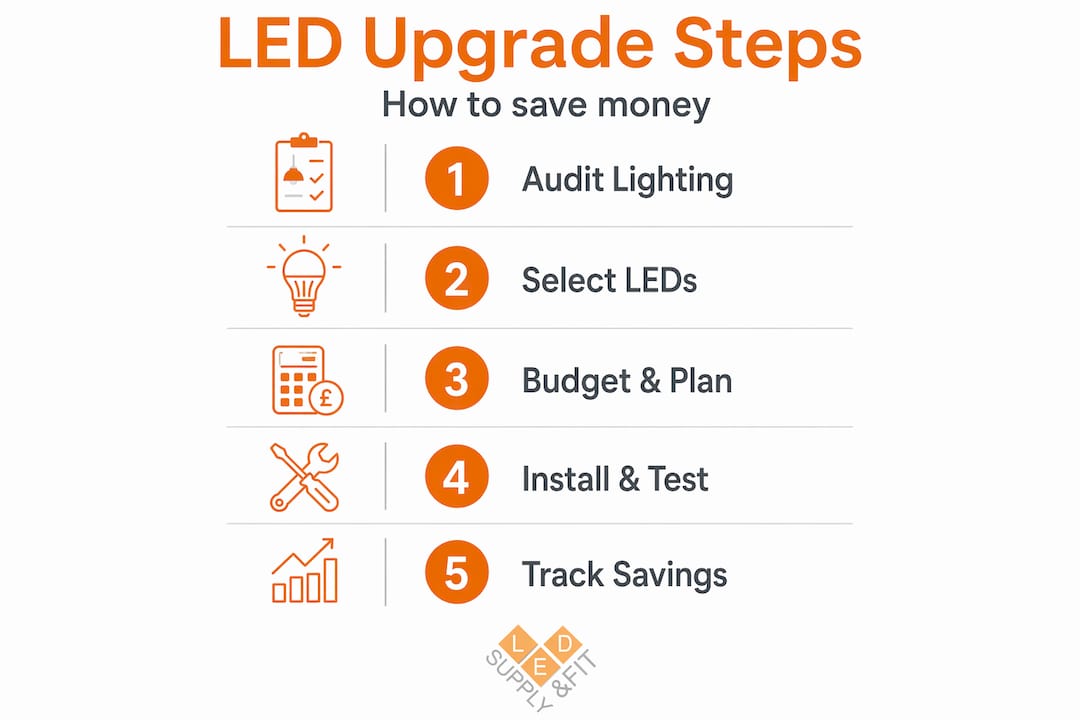
Office LED upgrade steps: a practical guide to saving money
TL;DR:
- Upgrading outdated office lighting to LED technology reduces energy costs and improves working conditions.
- A thorough audit and careful planning ensure the project delivers measurable savings and compliance with regulations.
- Proper sequencing, professional installation, and ongoing maintenance maximize long-term benefits and efficiency.
Outdated office lighting is one of the most overlooked drains on a commercial property budget. Fluorescent tubes, halogen downlights, and ageing metal halide fittings quietly consume enormous amounts of electricity while delivering inconsistent, uncomfortable light. The good news is that switching to LED technology is one of the fastest ways to cut energy costs and improve working conditions. But without a clear process, upgrades can go over budget, cause unnecessary disruption, or fail to deliver the savings promised. This guide walks you through every stage, from initial audit to long-term maintenance, so your project delivers real, measurable results.
Key Takeaways
| Point | Details |
|---|---|
| Audit first | Careful assessment of current lighting ensures your project meets real needs and avoids missed issues. |
| Plan and budget | A detailed plan and cost estimate help you avoid costly mistakes and make the most of available incentives. |
| Follow step-by-step | Methodically upgrading lighting with clear steps leads to best energy and performance results. |
| Verify and maintain | Check results and set up simple maintenance to ensure savings are sustained for years. |
Assess your current office lighting needs
After highlighting the pressing need for upgrades, the next step is to understand where your office stands now. Planning is crucial for any energy efficiency project, and that begins with a thorough audit of what you currently have.
Walk every room and corridor in your building. Count every fixture, note the lamp type (T8 fluorescent, T5, halogen, compact fluorescent), record the wattage, and document any visible problems. Common issues to flag include:
- Flickering or buzzing tubes that distract staff
- Dim or uneven light levels across workstations
- Fittings running far hotter than necessary
- Lamps that have been replaced multiple times in the past year, indicating poor reliability
- Emergency lighting that hasn’t been tested recently
Use a simple inventory table to capture what you find. Here is a basic format to adapt for your own building:
| Room | Fixture type | Quantity | Wattage each | Issues noted |
|---|---|---|---|---|
| Open plan office | T8 fluorescent | 24 | 58W | Flickering, poor colour |
| Reception | Halogen downlights | 12 | 50W | High heat output |
| Meeting room A | T5 batten | 6 | 35W | Dim in corners |
| Corridors | Bulkhead fittings | 8 | 28W | Several not working |
Once the data is collected, refer to an office lighting checklist to cross-reference your findings against recommended lux levels and efficiency standards. Set your primary goals at this stage: are you prioritising energy savings, improving light quality, meeting compliance requirements, or all three? Knowing your targets shapes every decision that follows.
Good workplace performance and savings are directly linked to light quality. Staff who work under poor lighting report more eye strain, lower concentration, and higher error rates. Getting the audit right is your foundation.
Pro Tip: Before finalising your audit, ask staff directly which areas they find uncomfortably bright, too dim, or flickery. Front-line feedback surfaces problems that a visual inspection can miss, especially in areas used only at certain times of day. Following project preparation steps used in other energy efficiency projects can also help structure your process.
Plan your LED upgrade: budgeting and design
Once your current needs are clear, it is time to move on to goal-driven planning and budgeting. Good design maximises efficiency and return on investment, so skipping this stage is rarely a saving worth making.
Start by working through these planning steps in order:
- Calculate the number and type of LED replacements needed based on your audit data.
- Identify which fixtures can accept direct LED replacements and which require new fittings.
- Establish target lux levels for each area (300 to 500 lux for standard office work, higher for detailed tasks).
- Get at least two written quotes, one from a specialist LED supplier and one from a local electrical contractor.
- Set a realistic timeline that accounts for delivery lead times and preferred installation windows.
- Confirm VAT implications. Many commercial energy efficiency projects qualify for reduced VAT rates, and it is worth checking with your accountant before finalising costs.
A common question at this stage is whether to manage the installation in-house or hire a professional. Here is a straightforward comparison:
| Factor | In-house installation | Professional installation |
|---|---|---|
| Upfront cost | Lower | Higher |
| Speed | Depends on staff availability | Generally faster |
| Compliance assurance | Relies on staff qualifications | Guaranteed by contractor |
| Warranty implications | May be affected | Protected |
| Risk of errors | Higher | Lower |
For most commercial properties with more than 20 fittings, professional installation pays for itself by avoiding rework and ensuring the job meets UK wiring regulations. A specialist in energy-efficient lighting will also advise on the best product choices for each application, something that makes a significant difference to long-term performance.
When it comes to product selection, knowing how to choose LED lights for your specific office environment will help you avoid over-specifying or under-delivering on light quality. Colour temperature, beam angle, and driver quality all affect the final result. Detailed project budgeting methods from other energy upgrade sectors can also offer useful frameworks for structuring costs.
Pro Tip: If your business is VAT-registered, check eligibility for a reduced 5% VAT rate on energy-saving materials. Combined with lower electricity bills, this can materially change the payback period of your investment.
Step-by-step: how to implement an office lighting upgrade
With a robust plan in place, you are ready for hands-on implementation. Proper sequencing reduces downtime and keeps costs under control, so follow these steps carefully:
- Notify staff and facilities teams of the schedule at least one week in advance.
- Arrange for all electrical work to be carried out by a Part P certified electrician or a qualified commercial electrical contractor.
- Isolate the relevant circuits at the consumer unit before any fitting is touched.
- Remove old fittings carefully, labelling circuits and noting any wiring anomalies for your electrician.
- Prepare wiring where needed, particularly if you are switching from magnetic ballast fluorescents to mains-voltage LED panels.
- Fit new LED fixtures, making sure each one is secured correctly and that connections are tested before reinstatement.
- Power up circuits one section at a time and test each fitting before moving to the next area.
- Arrange for the safe recycling of old fluorescent lamps through a licensed waste contractor. Fluorescent tubes contain mercury and cannot go into general waste.
Safety notice: Always isolate and lock off circuit breakers before working on any lighting circuit. Never assume a switch makes a circuit safe. Use a voltage tester on every conductor before touching any wiring. Electrical work in commercial premises must comply with BS 7671 (the IET Wiring Regulations).
The payoff for doing this properly is significant. A typical office sees up to 40% reduction in energy bills after a full LED upgrade. On a premises spending £2,000 per month on lighting electricity, that is £800 saved every month.
Schedule installation work after hours or over weekends where possible. Even a single disrupted working day costs more in lost productivity than a modest installation premium for out-of-hours labour. Also confirm that your upgraded layout meets DDA (Disability Discrimination Act) requirements for visual accessibility and that emergency lighting coverage is maintained throughout. Review smart upgrade tips to ensure nothing is overlooked during the final fit-out phase.
Verifying results and maintaining your LED system
With the upgrade complete, make sure you are realising the promised benefits and keeping your system running smoothly. Ongoing maintenance preserves both savings and compliance, so building a simple routine into your facilities management process is essential.
Start with a post-upgrade inspection checklist:
- Confirm brightness and uniformity across all work areas using a lux meter
- Check that emergency lighting activates correctly and that test records are updated
- Verify that all dimmer controls and sensors (if fitted) are operating as intended
- Confirm that every old fitting and lamp has been recycled or disposed of correctly
- Log the date of installation and expected lamp lifespan for future reference
Track performance over time using a simple monitoring table:
| Metric | Pre-upgrade baseline | Month 1 post-upgrade | Month 6 post-upgrade |
|---|---|---|---|
| Monthly electricity use (kWh) | Record at audit | Measure and compare | Measure and compare |
| Maintenance call-outs | Log previous average | Record actual | Record actual |
| Staff lighting complaints | Survey baseline | Survey result | Survey result |
| Estimated CO2 saved (kg) | Calculate from baseline | Update monthly | Update monthly |
For day-to-day upkeep, focus on these key actions:
- Dust fixtures every quarter to maintain full light output
- Check for any faults or failures immediately after they are reported
- Log monthly energy meter reads to spot unexpected increases early
- Schedule an annual inspection of emergency lighting and external fittings
Review LED lighting savings tips to find further optimisation opportunities once your system is bedded in. For broader context, energy project case studies from other commercial sectors show how ongoing monitoring consistently improves the long-term return on energy investments.
Pro Tip: Set a monthly reminder to read your electricity meter on the same date each month. A sudden spike after an LED upgrade almost always points to a specific fault, such as a failed driver or a control system issue, rather than a systemic problem. Catching it early saves money and prevents compliance issues.
Why quick fixes cost more: our take on lighting upgrades
Having covered all the essential project steps, it is worth pausing to share a perspective we have developed through working on commercial lighting projects of all sizes across the UK.
The most expensive lighting upgrades we see are never the ones with a big upfront budget. They are the ones where someone tried to cut corners at the audit or planning stage. A rushed assessment misses problem areas. A vague brief leads to wrong products being ordered. Inadequate testing after installation means faults are only discovered weeks later, often when a client notices their energy bill has barely moved.
One pattern stands out repeatedly: businesses that invest properly in an initial LED lighting project checklist and take the time to track results afterwards consistently achieve better savings than those who simply swap old tubes for new ones and assume the job is done. The difference is not the products. It is the process.
The conventional wisdom in facilities management tends to treat lighting as a low-priority maintenance task. We would argue it is one of the highest-leverage investments you can make in your building. The payback period on a well-planned LED upgrade is typically two to four years. The lifespan of a quality LED fitting is 50,000 hours or more. That is a decade of near-zero maintenance and consistently lower energy bills, provided the project is done properly from the start. Invest in the preparation. It always pays back.
Get tailored help for your office lighting upgrade
If you want results without all the trial and error, expert support can save time and money.
At LED Supply and Fit, we work with commercial property managers and business owners across the UK to design, supply, and install LED lighting systems that genuinely deliver on their promised savings. From small office refurbishments to multi-site rollouts, we handle the detail so you do not have to. Browse our range of top commercial LED solutions to see what is available, or explore our lighting design and compliance advice to understand how we approach each project. Getting started is straightforward: contact us for a tailored quote and we will take it from there.
Frequently asked questions
How long does an office LED upgrade take?
Most office LED upgrades take between one and three days, depending on office size and the complexity of existing wiring. Larger multi-floor projects are typically phased to minimise disruption.
What is the average energy saving from switching to LED office lighting?
Switching to LED lighting can cut energy bills by up to 40%, with further savings from significantly reduced maintenance and lamp replacement costs over time.
Is it better to hire a professional or do a DIY LED installation?
Professional installation maximises project success by ensuring compliance with UK wiring regulations and protecting product warranties, though small straightforward upgrades can be handled in-house if you have suitably qualified staff.
What regulations affect office lighting projects in the UK?
Upgrades must meet DDA requirements, fire safety standards, and workplace lighting regulations under the Health and Safety at Work Act, alongside compliance with BS 7671 for all electrical installation work.